Your cart
There are no more items in your cart

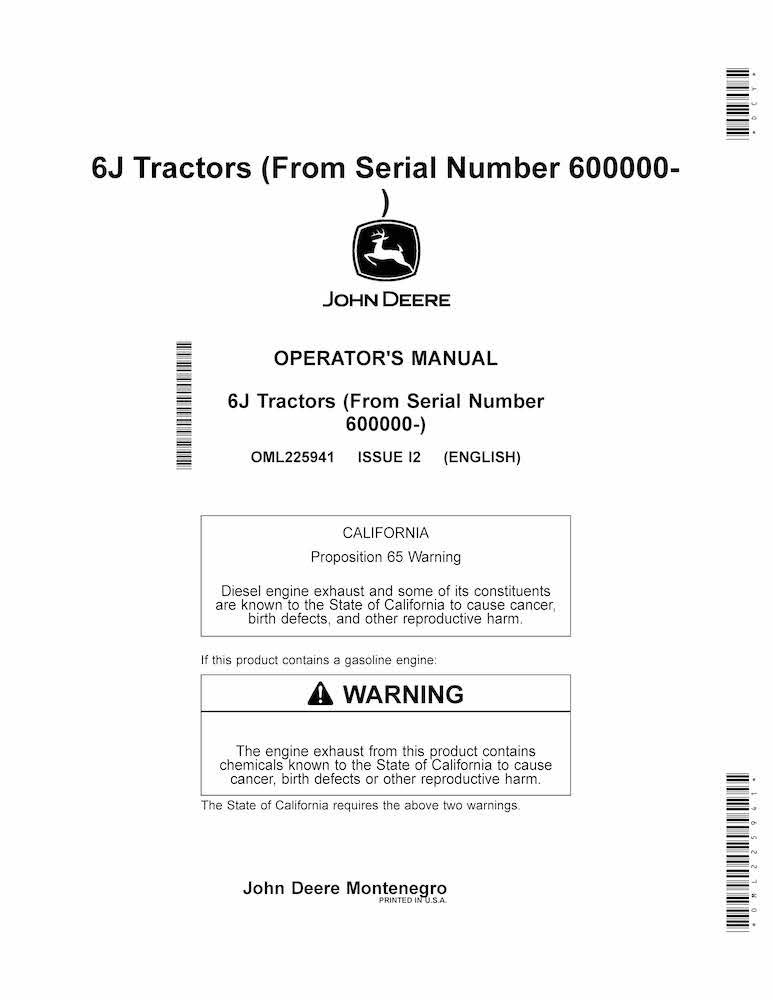
John Deere 6135J, 6150J, 6170J, 6190J, 6210J tractor pdf operator's manual
JD-OML225941-EN
$19.90
No tax
Format: PDF
Pages: 324
File size: 19.55 MB
Language: English
Models: 6J Tractors: 6135J, 6150J, 6170J, 6190J, and 6210J From Serial Number 600000-
Create an account and join to our cumulative discounts program. Spend at least 15$ and get 10.00% discount.
John Deere 6135J, 6150J, 6170J, 6190J, 6210J tractor pdf operator's manual is available for instant download after purchase. Download a free preview pdf file of the original document, and decide whether it suits your needs. This preview file in the Attachments section includes the initial part of the main document, about 5% of the pages, and you may get acquainted with the contents of the document.
- Language
- English
- Document type
- Operator's manual
- Machinery type
- tractor
Deere & Company, better known under the John Deere brand, is an American engineering company headquartered in Moline, Illinois, engaged in the production of agricultural, construction and forestry machinery, engines and transmissions.
Agricultural machinery: tractors, grain harvesters, cotton harvesters, balers, planters, forage harvesters and sprayers.
Construction machinery: Excavators, Loaders, Graders, Backhoe Loaders, Bulldozers.
Logging equipment: The company produces a whole line of forestry equipment.
Other products and services: In addition to heavy equipment, Deere & Company also manufactures consumer and commercial equipment, including lawn mowers, snow blowers, snowmobiles, and all-terrain vehicles. The company is also a supplier of diesel engines and power units (axles, transmissions, etc.) used in heavy machinery.
All this equipment needs timely and proper maintenance. Our manuals will be useful for the use, maintenance and repair of John Deere equipment.
Today, John Deere is known for its award-winning innovations, but have you ever really thought about how we got here? The most critical moments in John Deere history date back to 1837 when the man himself, John Deere, was a blacksmith in Grand Detour, IL who wanted to make farmers’ jobs a bit easier.
Fast forward over 180 years, and this company is still manufacturing equipment with the same purpose in mind – helping customers be as productive as possible. While Deere is widely known for its various tractor models, these machines were not being produced until 1918 – this is when the company purchased the Waterloo Engine Gas Company.
In addition to producing various types of equipment throughout the years, this company has also seen various leaders, logos, and factories over time. It is these individual moving parts that have made John Deere history so fascinating to reflect on. With an ongoing commitment to innovation, agriculture, and people, Deere has had no shortage of amazing breakthroughs that have established where it is today and where it will be in the future.
Let’s take a closer look at these moments in John Deere history.
Who Invented John Deere?
John Deere the company would not have been possible without the determination of John Deere the man. From the time he created the first steel plow in 1837, Deere was committed to helping farmers handle their daily tasks with ease. As demand for these plows rose, Deere moved the business from Grand Detour to Moline, IL in 1848 due to the power and transportation benefits this new location offered. Just two years later, around 1600 plows had been produced and John Deere began to expand its range of equipment, including the first ride-on plow, the Hawkeye Riding Cultivator, which relied on horses. This implement was first introduced at the Iowa State Fair in 1863.
As we look back on moments like these in John Deere history, it is critical to understand those who were at the forefront of this success.
Charles Deere (1886 – 1907)
The second son of John Deere, Charles Deere, took over leadership in 1886 before his father’s passing that same year. During his time as head of the company, Deere used his experience as a top salesman to establish John Deere’s first branch house in Kansas City. These branch houses “provided valuable information from the field that influenced new product development”. By the time of his death in 1907, Charles Deere played a central role in John Deere history by helping the company become one of the top implement makers in the country.
William Butterworth (1907 – 1936)
Just 15 years after joining Deere & Company as an assistant buyer, William Butterworth, son-in-law of Charles Deere, became president of John Deere in 1907. Under his leadership, 11 factories and 25 sales organizations were consolidated into one entity – this led to the development of the modern Deere & Company. The overall product line continued to expand during his time as head of the company; this includes entry into the combine harvester market in 1912 and the tractor business in 1918 through the purchase of the Waterloo Engine Gas Company. Once retiring in 1928, Butterworth became the company’s first chairman of the board and was elected to the US Chamber of Commerce before his death in 1936.
Charles Deere Wiman (1928 – 1955)
As the great-grandson of John Deere, Charles Deere Wiman started at the company as a line employee and eventually advanced to become president in 1928 with the retirement of his uncle, William Butterworth. Despite hardships resulting from the Great Depression, Wiman worked hard to ensure John Deere would continue its success. This led to the introduction of the famous Model “A” tractor in 1934, which was followed closely by the Model “B” the following year. Without this sense of dedication to the company, this important piece of John Deere history would cease to exist.
William Hewitt (1955-1982)
Just two years after joining Deere & Company as a territory manager in California, William Hewitt was named director in 1950 and became president after Charles Deere Wiman, Hewitt’s father-in-law, passed in 1955. From this point forward, the company began to establish itself as a multinational company, purchasing a share of a tractor company in Mannheim, Germany and acquiring land in Monterrey, Mexico in 1956. As John Deere expanded its global reach, the company also welcomed new four- and six-cylinder tractors under Hewitt’s leadership. These models – called the “New Generation of Power” – were officially introduced in 1960.
Robert Hanson (1982-1990)
Despite not being related to the man himself, Robert Hanson was still able to leave his mark within John Deere history. Hanson was named the president of Deere & Company in 1978 before being elected chairman and CEO following William Hewitt’s retirement in 1982. In the midst of difficult recessions in the 1980s, Hanson helped the company not only stay afloat but also exceed sales expectations. This positive trend continued and saw John Deere enter the health care market in 1985 with the formation of John Deere Health Care, Inc.
Hans Becherer (1990 – 2000)
Once elected as chairman of Deere & Company in 1990 upon Robert Hanson’s retirement, Hans Becherer stressed values that have played key roles in John Deere history since the creation of the first steel plow. A dedication to constant innovation and global growth enabled immense changes, such as the formation of a separate operating division for Deere’s lawn-and-grounds-care equipment operations. During Becherer’s tenure, the company continued to lead when it came to new ag technology and precision farming. Additionally, Deere & Company entered a long-term relationship with the PGA and opened the John Deere Pavilion in 1997 under his leadership.
Robert W. Lane (2000 – 2009)
Having managed a range of operations within the Worldwide Construction EquipmentDivision, Robert W. Lane had an understanding of what it would take to help Deere & Company attain maximum global growth. By establishing the SVA (Shareholder Value Added) model, the company was able to achieve world-class status in asset efficiency and ROI. This included modernizing traditional factories around the world and ensuring dealer organizations were upgraded in order to better meet customer demands. Upon his retirement as Chairman of Deere & Company’s Board of Directors in 2009, Lane was succeeded by Deere’s current Chairman and CEO, Samuel R. Allen.
Where is the John Deere Factory Located?
As customer demands evolve, John Deere factory locations across the world are designed to keep up. There are over 100 factories in more than 30 countries today.
As John Deere factory workers today help produce equipment for agriculture, lawn care, construction, outdoor recreation, and forestry, we should look back at those moments that helped this company stand the test of time.
- 1848: The company moved from its birthplace in Grand Detour, IL to Moline, IL due to the latter’s water, power, and transportation advantages.
- 1887: The Deere & Mansur Company, formed by Charles Deere and Alvah Mansur, a business partner of the Deere family, is a top manufacturer of planters. Due to the success of this division, Deere & Mansur moved from a small two-story building in Moline to a larger location once production became more significant.
- 1913: Under the leadership of William Butterworth, the company enters the harvesting business with a new factory, a critical moment in John Deere history. John Deere Harvester Works, which still produces S-Series combines and a variety of front-end equipment, would continue on to become one of the top John Deere factory locations for over a century.
- 1918: John Deere history is made when it enters the tractor business through the purchase of the Waterloo Gas Engine Company. This quickly proves to be a success, with Deere producing and selling 5,634 tractors in the first year.
- 1947: The John Deere Dubuque Works factory opened its doors and begins to produce a large percentage of the company’s construction and forestry equipment.
- 1948: In 1941, during WWII, the US government constructs the Des Moines Ordnance Plant in order to produce ammunition. Once the war concluded, John Deere purchased an industrial area of the plant which later turned into the Des Moines Works factory.
When did John Deere change their logo?
When it comes to understanding John Deere history, it is important to understand how branding within this company has changed to reflect changes across the business as a whole. Let’s explore these changes and take a deeper dive into the evolution of the John Deere logo.
- 1864: Once receiving its first patent, John Deere establishes itself as a force to be reckoned with in the world of manufacturing.
- 1876: As the company started to produce more equipment, they required a trademarkto defend against copying and deception. This John Deere logo was just the beginning of many designs to come as the company grew larger and entered new industries.
- 1912: Deere starts to produce planters, buggies, wagons, grain drills, and hay and harvesting equipment. The statement “The Trade Mark of Quality Made Famous by Good Implements” makes its first appearance on the new logo, which includes more detail than the original.
- 1936: In an effort to standardize processes while manufacturing equipment, this new logo removed some of the details from the previous logo – this made stenciling onto products easier.
- 1937: As Deere’s sales continue to increase, a new, simpler logo is introduced. This could be due to the fact that the trademark was being used in more places or that it was the company’s 100th anniversary that year.
- 1950: This logo set the stage for future logos in regards to the text, the slogan, the deer itself, and the removal of “Moline, IL” due to the company expanding its reach throughout the years.
- 1956: As Deere broke out into other industries, such as construction, the slogan “Quality Farm Equipment”, which was established in 1950, was dropped. “John Deere” was also placed under the leaping Deere for the first time.
- 1968: This new contemporary John Deee logo was designed for better reproduction and readability as the company continued to grow across all divisions.
- 2000: The creation of this current logo saw the addition of color and a change in the way the Deere is leaping – it is now leaping forwards instead of landing.
What all does John Deere make?
At the end of the day, key moments in John Deere history heavily revolve around the equipment. Since creating the first steel plow in 1837, the company has continuously produced machines that are changing the game. Here are some key points in time that stand out.
- 1912: Deere & Company introduces planters, buggies, wagons, grain drills, and hay and harvesting equipment to its product lineup.
- 1918: In the midst of building a tractor that could be sold for under $700, John Deere purchases the Waterloo Gasoline Engine Company. This was known as the John Deere Waterloo Boy N.
- 1927: The company introduces its first combine.
- 1934: John Deere’s first row crop tractor, the Model A, is introduced and followed one year later by the Model B.
- 1947: The Model M tractor is manufactured at John Deere Dubuque Works and eventually evolves into a bulldozer. This transformation kickstarts the company’s entry into the construction and forestry businesses.
- 1950: The No. 8 Cotton Picker is the first two-row self-propelled machine on the market.
- 1957: Haying becomes a one-man operation for the first time when the 14T baler is introduced. This piece of equipment produces twine-tied bales, improving overall productivity and ease of use.
- 1963: John Deere’s Consumer Equipment division enters the market with lawn and garden tractors in addition to attachments.
- 1992: John Deere & Company introduces its first Gator, the Gator TH. Despite originally being produced for light tasks, such as landscaping, this original Gator helped pave the way for those XUVs we enjoy today.
- 1994: The 8000 Series tractor makes its debut and establishes new standards in control, visibility, maneuverability, and power.
- 1996: John Deere makes history when it introduces the 7760 Cotton Picker, the first of its kind to build round cotton modules on the go.
Over the past century, John Deere has continued to evolve and find success along the way. Through different forms of leadership, logo designs, factory locations, and equipment production, this company has been able to stand out and prove itself time and time again. By looking back at John Deere history, we can prepare ourselves for all that it has to hold in the future.
LessOPERATOR'S MANUAL
- Introduction
- Foreword
- Emissions Performance and Tampering
- Operation and Maintenance
- Tampering
- Company Info
- Trademarks
- General View
- General View
- Safety
- Recognize Safety Information
- Understand Signal Words
- Follow Safety Instructions
- Prepare for Emergencies
- Wear Protective Clothing
- Protect Against Noise
- Handle Fuel Safely-Avoid Fires
- Handle Starting Fluid Safely
- Fire Prevention
- In Case of Fire
- Avoid Static Electricity Risk When Refueling
- Keep ROPS Installed Properly
- Use Foldable ROPS and Seat Belt Properly
- Stay Clear of Rotating Drivelines
- Use Steps and Handholds Correctly
- Read Operator's Manuals for ISOBUS Controllers
- Use Seat Belt Properly
- Operating the Tractor Safely
- Driving Concerns
- Heated and Ventilated Operator's Seat
- Towing Loads
- Parking and Leaving the Tractor
- Common Accidents
- Avoid Backover Accidents
- Limited Use in Forestry Operation
- Operating the Loader Tractor Safely
- Keep Riders Off Machine
- Instructional Seat
- Use Safety Lights and Devices
- Transport Towed Equipment at Safe Speeds
- Use Caution on Slopes, Uneven Terrain, and Rough Ground
- Freeing a Mired Machine
- Avoid Contact with Agricultural Chemicals
- Handle Agricultural Chemicals Safely
- Handling Batteries Safely
- Avoid Heating Near Pressurized Fluid Lines
- Remove Paint Before Welding or Heating
- Handle Electronic Components and Brackets Safely
- Practice Safe Maintenance
- Avoid Hot Exhaust
- Clean Exhaust Filter Safely
- Work In Ventilated Area
- Support Machine Properly
- Prevent Machine Runaway
- Park Machine Safely
- Transport Tractor Safely
- Service Cooling System Safely
- Service Accumulator Systems Safely
- Service Tires Safely
- Service Front-Wheel Drive Tractor Safely
- Tightening Wheel Retaining Bolts/Nuts
- Avoid High-Pressure Fluids
- Do Not Open High-Pressure Fuel System
- Store Attachments Safely
- Decommissioning - Proper Recycling and Disposal of Fluids and Components
- Safety Signs
- Replace Safety Signs
- Safety Signs Location
- Operator's Manual
- Use Seat Belt Properly
- Never Carry Riders-Tractors with Open Operator's Station
- Brake System Accumulator-6135J up to 6210J Tractors (If Equipped)
- Operator Controls
- Front Controls
- Tractors with Open Operator's Station
- Tractors with Cab
- Right-Hand Console Controls
- SyncroPlusSyncroPlus is a trademark of Deere & Company Transmission Controls
- PowrQuadPowrQuad is a trademark of Deere & Company Transmission and Implement Controls
- Implement Controls-Tractors with Cab
- Implement Controls (Tractors with Open Operator's Station)
- Key Switch
- Steering Column Tilt (Tractors with Cab)
- AutoTrac™ Universal (If Equipped)
- AutoTrac™ Integrated (If Equipped)
- Trailer Park Brake (If Equipped)
- Heater/Ventilation/Air-Conditioning System (HVAC) and Windshield Wiper Controls
- Trailer Brake Pressure Gauge (If Equipped)
- Electrical Starting Aid (If Equipped)
- Instrument Panel
- Information Display
- Software Update
- Lights
- Lights Identification
- Light Switches
- Hazard Warning Lights Switch
- Turn-Signal Lever
- Rear Worklight Adjustment (Tractors with Open Operator's Station)
- Worklights Adjustment (Tractors with Cab)
- Dome Light (Tractors with Cab)
- Trailer Socket (If Equipped)
- Operator's Station
- Roll-Over Protective Structure (ROPS)
- Seat Belt
- Manual Holder
- Operator's Seat-Mechanical Seat for Open Operator's Station Tractor
- Operator's Seat-Deluxe Mechanical Seat
- Operator's Seat-Deluxe Pneumatic Seat
- Instructional Seat (If Equipped)
- Mirrors
- Service ADVISOR™ Socket
- Convenience Outlet (If Equipped)
- Access Ladder Adjustment
- Cab Door
- Cab Windows
- Windshield Wiper and Washer System
- Heater/Ventilation/Air-Conditioning System (HVAC) Operation
- Monitors and Instruments Installation (Tractors with Cab)
- AutoTrac™ Assisted Steering System (If Equipped)
- GreenStar™ Connectors
- Implement Bus Connector (If Equipped)
- Prestarting Checks
- Comply with Operator's Manuals of Implement Manufacturers
- Tires Condition Check
- Engine Oil Level Check
- Coolant Level Check
- Transmission/Hydraulic System Oil Level Check
- Drain Water and Sediments from Fuel Filters
- Operating the Engine
- Start Only From Operator's Seat
- Engine Fuel System and Power Rating
- Fuel System
- Engine Certification/Power Rating
- Important Instructions Regarding Alternator
- Warming and Operation the Engine Slow
- Engines with Turbocharger
- Start the Engine-SyncroPlus™ Transmission
- Start the Engine-PowrQuad™ Transmission
- Instruments Check After Engine Start-Up
- Charging System Check
- Engine Oil Pressure Check
- Engine Air Cleaner Restriction Check
- Coolant Temperature Check
- Fuel Level Check
- Engine Speeds
- Shut Off the Engine
- Measure in the Event of Engine Runaway
- Starting with Booster Battery
- Restarting an Engine Which Has Run Out of Fuel
- FieldCruise™ Control (If Equipped)
- Operating the Tractor
- Avoid Contact with Agricultural Chemicals
- Measures to Prevent Tractor from Tipping Rearwards
- Avoid Power Lines
- Handle Round Bales Safely
- Operator Need to be Trained
- Be Careful on Descents
- Do Not Exceed Maximum Speeds
- Driving on Public Roads
- Front-Wheel Drive Operation
- Operation of Hydraulic Brakes
- Emergency Brake Operation (Manual Mode)
- Differential Lock Operation
- Reduce Fuel Consumption
- Carry Out Correct Service
- Drive with the Correct Tire Pressures
- Choose Correct Ballast
- Select the Correct Gear
- Stop the Tractor
- John Deere 3 Meters Front Axle Safely Operation (If Equipped)
- General Recommendations for Tractors Operating with 3 Meters Tread (If Equipped)
- Air Trailer Brake (If Equipped)
- Connecting Procedure
- Operation of the Air Trailer Brakes
- Disconnecting Procedure
- Use Emergency Exit
- Operating the Transmission
- Selecting Gears
- SyncroPlus™ Transmission Operation
- PowrQuad™ Transmission Operation
- Creeper Transmission (If Equipped)
- Rear Hitch
- Match Tractor Power to Implement
- Maximum Lifting Force
- Rear Hitch Components
- Rear Hitch Controls
- Tractors with Open Operator's Station
- Tractors with Cab
- Hitch Remote Control Switches (If Equipped)
- Rear Hitch Operation
- Hitch Control Lever
- Hitch Control Lever Limiter-Only for Tractors with Cab
- Transport Position
- Float Position
- Quick Raise-Lower Switch (Cab Tractors Only)
- Hitch Dampening™ (Cab Tractors Only)
- Raise Limit Adjustment (Cab Tractors Only)
- Rate-of-Drop Adjustment (Cab Tractors Only)
- Load Depth Adjustment (Cab Tractors Only)
- Rear Hitch Manual Engaging (Cab Tractors Only)
- Center Link Adjustment
- Center Link Positions
- Leveling Implement
- Stabilizer Bars
- Draft Link Vertical Play Position
- Three-Point Rear Hitch Linkage
- Implement Attachment and Detachment-Ball Joint Linkage
- Implement Attachment
- Implement Detachment
- Implement Attachment and Detachment-Hook
- Implement Attachment
- Implement Detachment
- Selective Control Valves
- Selective Control Valves Symbol Definitions
- Selective Control Valves (SCVs)
- Tractors with Open Operator's Station
- Tractors with Cab
- Mechanical Selective Control Valves (200 Series and 450 Series)
- Levers of the Selective Control Valves (SCVs)-Operation
- Detent Relief Adjustment-Deluxe Selective Control Valve (450 Series Only)
- Flow Rate Adjustment-Deluxe Selective Control Valve (450 Series Only)
- Loader Operation Through Selective Control Valves (SCV)
- Connect the Hydraulic Hoses
- Disconnect the Hydraulic Hoses
- Maximum Permissible Oil Draft
- Pressure-Free Port and Case Drain Kit (If Equipped)
- Additional Oil Reservoir (If Equipped)
- Power Take-Off
- PTO Operating Instructions
- Power Take-Off Operation (PTO)
- Power Take-Off Speed (PTO)
- Power Take-Off (PTO) Reversible Shaft (If Equipped)
- Coupling Implements Driven by the Power Take-Off (PTO)
- Drawbar
- Correct Use of Drawbar
- Swinging Drawbar
- Drawbar Length Adjustment
- Drawbar Equipped with Locking Pin
- Drawbar Equipped with Locking Plate
- Drawbar with Ball Pin (If Equipped)
- Drawbar Side-by-Side Adjustment
- Drawbar Height Adjustment
- Attaching Implements to the Drawbar
- Wheels, Tires, and Tread
- Service Tires Safely
- Safely Mounting Tires
- Tire Parts
- Tire Denomination
- Diagonal tire
- Radial tire
- High flotation tire
- Tire Tread Types
- Tire Inflation Pressure Norms
- Tire Inflation Pressure Management
- Inflation Pressure
- Tire Combinations
- Tire Inflation Pressures
- 6100J and 6115J Tractors-Diagonal Tires
- 6125J and 6135J Tractors-Diagonal Tires
- 6150J Tractors
- 6170J and 6190J Tractors
- 6210J Tractors
- Toe-In Check
- Toe-In Adjustment
- Limiting Steering Angle
- Tighten Front Wheel Attaching Nuts
- Front Wheel Tread Width Settings
- Front Fenders Adjustment (If Equipped)
- Height Adjustment
- Width Adjustment
- Tighten Rear Wheel Screws and Nuts-Flanged Axle
- Tighten Rear Wheel Screws and Attaching Nuts-Standard Rack and Pinion
- Tighten Rear Wheel Screws-Rack and Pinion with Steel Wheel
- Tighten Rear Wheel Screws-Rack and Pinion Axle with Cast Wheel
- Rear Wheel Tread Width Adjustment-Flanged Axle
- Rear Wheels Tread Adjustment-Standard Rack and Pinion
- Rear Wheels Tread Adjustment-Rack and Pinion with Steel Wheel
- Rear Wheel Tread Width Settings-Flanged Axle
- Rear Wheel Tread Width Settings-Rack and Pinion Axle
- Direction of Tire Rotation
- Instructions For Double Tires
- Ballasting
- Ballasting Optimization-Select the Correct Weights
- Guidelines for Tractor Ballasting
- Determining Ballast
- Factors determining amount of ballast:
- Weight split factors (%):
- Before adding ballast to your tractor, consider these important factors to attain optimum performance:
- Ballasting levels:
- Power Hop
- Ballast Calculation for Optimum Performance
- Front Weight Calculation
- Rear Weight Calculation
- Ballasting Tires with Water
- Emptying Tires With Liquid Ballast
- Using Liquid Ballast in Tires
- Tires and Loads
- Wheel Slip Measuring (Manually)
- Method of Measuring Slip Rate Using a Stopwatch
- Slip Rate
- Front Weights
- Front Weights Installation
- For Eight Front Weights or Less
- For Ten or More Front Weights
- Front Axle Maximum Load with Front-Mounted Implements
- Rear Wheel Weights
- 49 kg (108 lb), 55 kg (121 lb), and 38.5 kg (85 lb) Wheel Weights
- 72 kg (158 lb) Wheel Weights
- Transporting the Tractor
- Transport Tractor Safely
- Towing the Tractor
- Tractor Storage
- Using High Pressure Washers
- Use Compressed Air
- Long Period Storage
- Removing Tractor from Storage
- Paint Finish Care
- Access to Service Points
- Access to Engine Compartment
- Remove and Install Engine Side Shields
- Left-Hand Side Shield
- Right-Hand Side Shield-Tractors with Open Operator's Station
- Right-Hand Side Shield-Tractors with Cab
- Access to Battery
- 6100J Tractors with Tier 3-Stage IIIA Engine and 6115J Tractors with Non-Emissions Certified Engine
- 6115J Tractors with Tier 3-Stage IIIA Engine and 6125J up to 6210J Tractors
- Access to Fuses and Relays
- Main Fuses-6100J Tractors with Tier 3-Stage IIIA Engine and 6115J Tractors with Non-Emissions Certified Engine
- Power Link Box-6115J up to 6210J Tractors with Tier 3-Stage IIIA Engine
- Fuels, Lubricants, and Coolant
- Engines with Tier 3-Stage IIIA/MAR-I Emission Control
- Storing Fuel
- Diesel Fuel
- Required Fuel Properties
- E-Diesel fuel
- Sulfur Content for Interim Tier 4, Final Tier 4, Stage III A and B, Stage IV, and Stage V Engines Above 560 kW
- Sulfur Content for Interim Tier 4, Final Tier 4, Stage III B, Stage IV Engines, and Stage V Engines
- Sulfur Content for Tier 3 and Stage III A Engines
- Sulfur Content for Tier 2 and Stage II Engines
- Sulfur Content for Other Engines
- Lubricity of Diesel Fuel
- Handling and Storing Diesel Fuel
- Supplemental Diesel Fuel Additives
- Biodiesel Fuel
- John Deere Stage V Engines Operating in the European Union
- John Deere Engines with Exhaust Filter Except Stage V Engines Operating in the European Union
- John Deere Engines Without Exhaust Filter
- Biodiesel Use Requirements and Recommendations
- Testing Diesel Fuel
- Minimizing the Effect of Cold Weather on Diesel Engines
- Use Winter Grade Fuel
- Air Intake Heater
- Ether
- Coolant Heater
- Seasonal Viscosity Oil and Proper Coolant Concentration
- Diesel Fuel Cold Flow Additive
- Biodiesel
- Winterfronts
- Radiator Shutters
- Complete Up Fuel Tank
- Fuel Filters
- Mixing of Lubricants
- Transmission and Hydraulic Oil
- Oil Filters
- Oilscan™ and CoolScan™
- Filter Element for Transmission - Hydraulic System
- Differential Housing Oil and Final Drive Oil-ZF Front Axle
- Differential Housing Oil and Final Drive Oil-DANA Front Axle
- Differential Housing Oil and Final Drive Oil-3-Meter Front Axle
- Multipurpose Extreme Pressure (EP) Grease
- Alternative and Synthetic Lubricants
- Lubricant Storage
- Diesel Engine Coolant (engine with wet sleeve cylinder liners)
- Preferred Coolants
- Additional Recommended Coolants
- Other Coolants
- Water Quality
- Coolant Drain Intervals
- Operating in Warm Temperature Climates
- Water Quality for Mixing with Coolant Concentrate
- Freeze Protection
- Testing Coolant Freeze Point
- Engine Oil - Only for Non-Emissions Certified Engines
- Diesel Engine Break-In Oil - Non-Emissions Certified and Certified Tier 1, Tier 2, Tier 3, Stage I, Stage II, and Stage III
- Diesel Engine Oil - Non-Emissions Certified and Certified Tier 1 and Stage I
- John Deere Plus-50Plus-50 is a trademark of Deere & Company II oil is preferred.
- Extended Diesel Engine Oil Service Intervals - Non-Emissions Certified and Certified Tier 1 and Stage I
- Reducing the Replacement Interval of Engine Oil
- Engine Oil - Only for MAR-I, Tier 3, and Stage IIIA Engines (6100J up to 6190J Tractors)
- Diesel Engine Break-In Oil - Non-Emissions Certified and Certified Tier 1, Tier 2, Tier 3, Stage I, Stage II, and Stage III
- Diesel Engine Oil - Tier 3 and Stage IIIA
- John Deere Plus-50 Plus-50 is a trademark of Deere & Company II oil is preferred.
- Engine Oil and Filter Service Intervals-Tier 3 and Stage IIIA - PowerTech™ Engines
- Reducing the Replacement Interval of Engine Oil
- Engine Oil - Only for MAR-I, Tier 3, and Stage IIIA Engines (6210J Tractors)
- Diesel Engine Break-In Oil - Non-Emissions Certified and Certified Tier 1, Tier 2, Tier 3, Stage I, Stage II, and Stage III
- Diesel Engine Oil - Tier 3 and Stage IIIA
- John Deere Plus-50 Plus-50 is a trademark of Deere & Company II oil is preferred.
- Engine Oil and Filter Service Intervals - Tier 3 and Stage IIIA - PowerTech™ Engines
- Reducing the Replacement Interval of Engine Oil
- Maintenance and Service Intervals
- Required Emission-Related Information
- Service Provider
- Clean Vehicle of Hazardous Pesticides
- Important Considerations
- General Instructions Regarding the Condition of the Tractor
- Engine and Exhaust Compartments
- Periodic Services
- Service Intervals Chart
- Service-Break-In Period
- Service-Daily or Every 10 Hours
- Service-Every 50 Hours
- Service-Weekly
- Service-Yearly
- Service-Every 125 Hours
- Service-Every 175 Hours
- Service-Every 200 Hours
- Service-Every 250 Hours
- Service-Every 350 Hours
- Service-Every 375 Hours
- Service-Every 400 Hours
- Service-Every 500 Hours
- Service-Every 750 Hours
- Service-Every 1000 Hours
- Service-Every 2 Years
- Service-Every 2 Years or 1500 Hours
- Service-Every 2 Years or 2000 Hours
- Service-Every 5 Years or 4500 Hours
- Service-Every 6 Years or 6000 Hours
- Break-in Period
- Closely Monitor Tractor Performance
- Perform Break-In Checks
- First 10 Hours
- First 50 Hours
- First 100 Hours
- Service-Engine
- Engine Oil Level Check
- Change Engine Oil
- Replace Engine Oil Filter
- Check Thermovalve Opening Temperature
- Replace the Engine Thermovalve
- Clean Crankcase Vent Line
- Check Engine Speeds
- Test Engine Injector Nozzles
- Adjust Engine Valve Clearance
- Service-Fuel, Air Intake, Exhaust, and Cooling
- Drain Water and Sediments from Fuel Filters
- Drain Water and Sediments from Fuel Tank
- Bleed Fuel System
- Replace Primary Fuel Filter
- Replace Secondary Fuel Filter
- Check Air Intake Hoses
- Clean Primary Engine Air Cleaner
- Cleaning Procedure
- Replace Primary and Secondary Engine Air Cleaners
- Primary Engine Air Cleaner
- Secondary Engine Air Cleaner
- Check Engine Fan Belt
- Replace Engine Fan Belt
- Check Alternator Belt-6170J, 6190J, and 6210J Tractors
- Check Coolant System
- Check Coolant Level
- Test Coolant
- Change Coolant
- Draining Procedure
- Flushing Procedure
- Filling Procedure
- Clean Radiator and Oil Cooler/Air Conditioner Condenser-6100J Tractors
- Clean Radiator and Oil Cooler/Air Conditioner Condenser-6115J Tractors with Non-Emissions Certified Engine
- Tractors with Open Operator's Station
- Tractors with Cab
- Clean Radiator, Fuel Cooler, and Air Conditioner Condenser-6115J and 6125J Tractors with Tier 3-Stage IIIA Engine
- Clean Radiator, Fuel Cooler, and Air Conditioner Condenser-6135J up to 6210J Tractors
- 6135J, 6150J, 6170J, and 6190J Tractors with Non-Emissions Certified Engines
- 6135J, 6150J, 6170J, 6190J, and 6210J Tractors with Tier 3-Stage IIIA Engine
- Service-Electrical
- Prevent Battery Explosions
- Important Instructions Regarding Alternator
- Check Charge and Clean Battery
- Handling the Battery
- Battery Cleaning
- Battery Charge Check
- Check the Starting System
- Check the Engine Ground Points
- Access to Main Fuses (If Equipped)
- Access to Power Link Box (If Equipped)
- Access to Fuse Box-Tractors with Open Operator's Station
- Access to Fuse Box-Tractors with Cab
- Handle Halogen Light Bulbs Safely
- Check Tractor Lights
- Adjust the Headlights with a Testing Device
- Adjust the Headlights without a Testing Device
- Replace High and Low-Beam Headlights Bulbs
- Replace Front Turn-Signal Lights, Hazard Warning Lights, and Clearance Lights Bulbs-Tractors with Open Operator's Station
- Replace Front Turn-Signal Lights and Hazard Warning Lights Bulbs-Tractors with Cab
- Replace Rear Turn-Signal Lights, Hazard Warning Lights, and Brake Lights Bulbs
- Replace Rear Worklight Bulb-Tractors with Open Operator's Station
- Replace Worklights-Tractors with Cab
- Standard Worklights
- Premium Worklights
- Replace Backup Light Bulb
- Replace License Plate Light Bulb
- Service-Drivetrain
- Check Neutral Start System-SyncroPlus™ Transmission
- Check Neutral Start System-PowrQuad™ Transmission
- Check Transmission Park System-SyncroPlus™ Transmission
- Check Transmission Park System-PowrQuad™ Transmission
- Check Engine to Transmission U-Joint Shaft
- Replace Engine Crankshaft Vibration Damper
- Lubricate Front-Wheel Drive Driveshaft
- Lubricate DANA Front Axle
- Check Front Axle Differential Housing Oil Level-DANA Front Axle
- Change Front Axle Differential Housing Oil-DANA Front Axle
- Check Front Axle Final Drive Housing Oil Level-DANA Front Axle
- Change Front Axle Final Drive Housing Oil-DANA Front Axle
- Lubricate ZF Front Axle
- Check Front Axle Differential Housing Oil Level-ZF Front Axle
- Change Front Axle Differential Housing Oil-ZF Front Axle
- Check Front Axle Final Drive Housing Oil Level-ZF Front Axle
- Change Front Axle Final Drive Housing Oil-ZF Front Axle
- Lubricate John Deere 3-Meter Front Axle (If Equipped)
- Check Front Axle Differential Housing Oil Level-John Deere 3-Meter Front Axle
- Change Front Axle Differential Housing Oil-John Deere 3-Meter Front Axle
- Check Front Axle Final Drive Housing Oil Level-John Deere 3-Meter Front Axle
- Change Front Axle Final Drive Housing Oil-John Deere 3-Meter Front Axle
- Lubricate Rear Axle Bearings
- Lubricate Power Take-Off Shaft
- Service-Steering and Brakes
- Check Hydraulic Brakes
- Bleed Hydraulic Brakes
- Drain Trailer Brake Compressed-Air Tank (If Equipped)
- Service-Hydraulics
- Check Hydraulic Hoses
- Adjust Hydraulic System
- Transmission/Hydraulic System Oil Level Check
- Replace Transmission and Hydraulic Oil Filters
- Change Transmission/Hydraulic System Oil
- Clean Transmission/Hydraulic Oil Suction Screen
- 6100J up to 6135J Tractors
- 6150J up to 6210J Tractors
- Drain Additional Oil Reservoir (If Equipped)
- Service-Wheels and Hardware
- Check Condition of Tires
- Check Tractor for Loose Screws
- Tighten Rear Hitch Screws (If Equipped)
- Lubricate Greasing Points
- Lubricate Rear Hitch (If Equipped)
- Check Wheel Bearings for Play
- Tighten Attaching Nuts of Front Wheels
- Tighten Rear Wheel Screws and Nuts-Flanged Axle
- Tighten Rear Wheel Screws and Attaching Nuts-Standard Rack and Pinion
- Tighten Rear Wheel Screws-Rack and Pinion with Steel Wheel
- Tighten Rear Wheel Screws-Rack and Pinion Axle with Cast Wheel
- Service-Operator's Station
- Check Seat Belt
- Clean Cab Air Filter
- Replace Cab Air Filter
- Check Air-Conditioning System
- Lubricate Operator's Seat Guide Rails
- Troubleshooting
- Engine Troubleshooting
- Transmission Troubleshooting
- Hydraulic System Troubleshooting
- Electrical System Troubleshooting
- Brakes Troubleshooting
- Three-Point Rear Hitch Troubleshooting
- Selective Control Valves (SCV) Troubleshooting
- Operator's Station Troubleshooting
- Tractor Operation Troubleshooting
- On-Board Diagnostics (OBD)
- On-Board Diagnostic (OBD) Tool
- Information, STOP, and Service Alert Indicators/Alarms
- On-Board Diagnostic (OBD) Tool Operation
- Diagnostic Trouble Code (DTC) Mode
- Diagnostic Address (DA) Mode
- Specifications
- Engine Specifications-Non-Emissions Certified Engine
- Engine Specifications-MAR-I-Tier 3-Stage IIIA Engines
- Fuel System Specifications-Non-Emissions Certified Engine
- Fuel System Specifications-MAR-I-Tier 3-Stage IIIA Engines
- Clutch Specifications
- SyncroPlus™ Transmission
- Creeper Transmission Specifications
- Tractor Speeds with SyncroPlus™ Transmission
- PowrQuad™ Transmission
- Tractor Speeds with PowrQuad™ Transmission
- 6100J up to 6135J Tractors
- Speeds with Creeper Transmission (If Equipped)
- 6135J Tractor
- 6150J Tractor
- 6170J and 6190J Tractors
- 6210J Tractor
- Power Take-Off (PTO) Specifications
- Electrical System Specifications
- Brake Specifications
- Front Axle Specifications
- Rear Axle Specifications
- Hydraulic System Specifications
- Tire Combinations
- 6100J Tractor
- 6115J Tractor
- 6125J and 6135J Tractors
- 6150J Tractor
- 6170J and 6190J Tractors
- 6210J Tractor
- Capacities
- Weights
- 6100J Tractor
- 6115J Tractor
- 6125J Tractor
- 6135J Tractor
- 6150J Tractor
- 6170J Tractor
- 6190J Tractors
- 6210J Tractors
- Dimensions-Tractors with Open Operator's Station
- Dimensions-Tractors with Cab
- Metric Bolt and Screw Torque Values
- Unified Inch Bolt and Screw Torque Values
- Carbon Dioxide Emissions (CO₂)
- Serial Numbers
- Interpreting Machine Serial Number
- Interpreting Engine Serial Number
- Engine Serial Number (A)
- Engine Model Number (B)
- Identification Numbers
- Product Identification Number
- Engine Serial Number
- Operator's Station Serial Number
- StarFireStarFire is a trademark of Deere & Company 6000 Unit Serial Number (If Equipped)
- SyncroPlus™ Transmission Serial Number
- PowrQuad™ Transmission Serial Number
- Differential Housing Serial Number
- Front Axle Serial Number-ZF Front Axle
- Front Axle Serial Number-DANA Front Axle
- Keep Proof of Ownership
- Keep Machines Secure
- Lubrication and Service Records
- How to Use the Service Records
- As Required Service Record
- Daily or 10 Hours Service Record
- 50 Hours Service Record
- Weekly Service Record
- Yearly Service Record
- 125 Hours Service Record
- 175 Hours Service Record
- 200 Hours Service Record
- 250 Hours Service Record
- 350 Hours Service Record
- 375 Hours Service Record
- 400 Hours Service Record
- 500 Hours Service Record
- 750 Hours Service Record
- 1000 Hours Service Record
- 2 Years Service Record
- 2 Years or 1500 Hours Service Record
- 2 Years or 2000 Hours Service Record
- 5 Years or 4500 Hours Service Record
- 6 Years or 6000 Hours Service Record
- Glossary
- Glossary of Terms
- Index
- John Deere Service Literature Available
- Technical Information
- John Deere-Keeps You On The Job
- John Deere Parts
- The Right Tools
- Well-Trained Technicians
- Prompt Service
Viewed products
- New
8 other products in the same category:

Tap to zoom